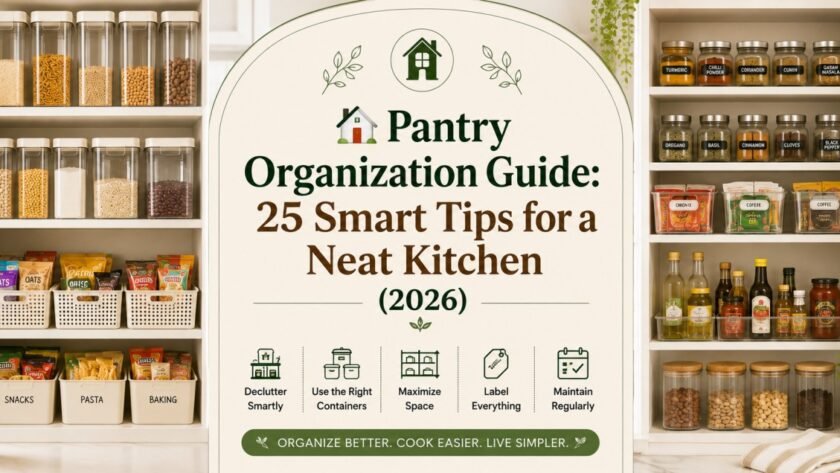

A pantry can be perfectly stocked and still look like complete chaos. One packet is hiding behind another, the rice container is somehow sitting in front of the flour, snacks have migrated to three different shelves, and you’re pretty sure there’s a packet of pasta hiding somewhere from 2024. 😭
Sound familiar?
That’s exactly why a good Pantry Organization Guide isn’t about making your shelves look pretty for a photo. It’s about creating a storage system that makes your kitchen easier to use every single day.
A well-organized pantry can help you see what you already have, find ingredients faster, make better use of shelf space and keep frequently used products within easy reach. It can also make grocery shopping less chaotic because you’re less likely to buy something you already have buried at the back of a cabinet.
The good news? You don’t need a giant walk-in pantry or an expensive collection of matching containers.
Whether you have a dedicated pantry, a few kitchen cabinets or one tiny shelf that is doing the work of an entire pantry, the same basic principles can help.
In this Pantry Organization Guide, we’ll look at practical ways to declutter your pantry, create useful categories, choose the right storage containers, maximize vertical space and build a system that’s actually easy to maintain.
Because the ultimate goal isn’t a pantry that looks organized for one weekend.
It’s a pantry that stays organized on a random Wednesday when you’re hungry and looking for biscuits. 😂
Also Read | Modular vs Stackable Storage Which Is Best?
🏠 Why Pantry Organization Matters
Before buying storage bins and containers, it’s worth understanding why pantry organization makes such a difference.
A disorganized pantry creates several small problems that add up over time.
You may:
- Forget what food you already own
- Buy duplicate products
- Lose track of expiry dates
- Waste shelf space
- Struggle to find everyday ingredients
- Leave half-open packets scattered around
- Push older products to the back
- Spend more time cleaning
- Avoid using ingredients simply because they’re difficult to reach
Good organization solves many of these problems by giving everything a logical place.
Instead of randomly placing groceries wherever there’s room, you create designated zones based on how you actually use your kitchen.
📦 Pantry Organization Guide: The Basic System
If you remember nothing else from this Pantry Organization Guide, remember these six steps:
1. Declutter
Remove expired, empty and unnecessary items.
2. Clean
Wipe the shelves before putting everything back.
3. Categorize
Group similar products together.
4. Measure
Understand the actual dimensions of your shelves.
5. Organize
Use bins, containers and other storage solutions where they genuinely help.
6. Maintain
Spend a few minutes regularly putting everything back where it belongs.
It sounds simple because it is.
The hard part is resisting the temptation to buy 25 organizers before completing step one. 😅
🧹 Step 1: Empty Your Pantry Before Organizing
This is probably the least glamorous part of the process, but it’s also one of the most important.
Don’t try to organize around existing clutter.
Take everything out.
Yes, everything.
Put the items on a clean counter, dining table or another temporary surface.
Once the shelves are empty, you’ll immediately see:
- Expired products
- Duplicate items
- Empty boxes
- Forgotten ingredients
- Damaged packaging
- Products that belong somewhere else
You may also discover that your pantry isn’t actually too small.
It was simply too cluttered.
🗑️ What Should You Remove?
As part of this Pantry Organization Guide, create a few simple groups.
Keep
Products you regularly use or genuinely intend to use.
Relocate
Items that belong somewhere else.
For example, cleaning supplies shouldn’t be mixed with food.
Discard
Expired, spoiled, damaged or unusable products.
Donate
Where appropriate, unopened and suitable food that you know you won’t use can be given away rather than occupying valuable pantry space.
💡 Don’t Keep Something Just Because You Bought It
If you’ve had the same ingredient sitting untouched for years, ask yourself whether you’re realistically going to use it.
A pantry isn’t a museum for ambitious cooking projects. 😂
🧼 Step 2: Clean the Shelves
Once everything is out, give your shelves a proper clean.
Remove:
- Crumbs
- Food dust
- Spilled flour
- Sticky residue
- Loose packaging pieces
- Dust from corners
Use a suitable kitchen-safe cleaning method for the material of your shelves and let the area dry properly before returning food.
Pay Special Attention to:
Dust and food particles tend to collect there.
Back edges
These areas can easily be forgotten.
Under containers
Spills often go unnoticed underneath storage boxes.
Cabinet joints
Small crumbs can collect around edges and hinges.
A clean starting point makes the rest of your pantry organization much easier.
🗂️ Step 3: Create Pantry Categories
Now comes the fun part.
Instead of putting everything back randomly, create categories.
A practical pantry might include:
🥣 Breakfast
- Oats
- Cereals
- Cornflakes
- Breakfast mixes
🍪 Snacks
- Biscuits
- Chips
- Namkeen
- Crackers
- Chocolates
🍝 Pasta & Noodles
- Pasta
- Instant noodles
- Vermicelli
- Macaroni
🧁 Baking
- Flour
- Cocoa powder
- Baking powder
- Baking soda
- Sprinkles
🍚 Grains & Pulses
- Rice
- Dal
- Pulses
- Quinoa
- Semolina
☕ Tea & Coffee
- Tea
- Coffee
- Sugar
- Tea bags
- Coffee sachets
🌶️ Spices
- Everyday spices
- Whole spices
- Spice blends
- Seasoning mixes
🥜 Dry Fruits & Seeds
- Almonds
- Cashews
- Raisins
- Seeds
🥫 Canned & Packaged Foods
- Canned vegetables
- Sauces
- Soup
- Ready-to-eat foods
The exact categories don’t matter as much as consistency.
Create categories that make sense for your household.
🧠 Organize Based on How You Use Your Kitchen
Here’s one of the most important principles in this Pantry Organization Guide:
Don’t organize according to what looks good. Organize according to what you actually use.
If you drink tea several times a day, your tea and coffee supplies should be extremely easy to reach.
If you bake once every three months, your baking ingredients don’t need the most accessible shelf.
If your family eats snacks every evening, snacks deserve their own easily accessible zone.
Your pantry should reflect your real routine.
Not a showroom.
👀 Step 4: Keep Everyday Items at Eye Level
One of the easiest pantry organization tricks is to organize shelves according to frequency of use.
Eye Level
Keep products you use frequently.
Examples:
- Tea
- Coffee
- Breakfast items
- Everyday spices
- Common cooking ingredients
Middle Shelves
Keep moderately used products.
Examples:
- Pasta
- Baking supplies
- Extra snacks
- Specialty ingredients
Lower Shelves
Keep:
- Heavy containers
- Large bottles
- Bulk ingredients
- Extra stock
Top Shelves
Keep products you don’t use frequently.
Examples:
- Seasonal ingredients
- Backup supplies
- Specialty cooking products
This arrangement means you’re not constantly reaching, bending or moving other containers.
🏋️ Step 5: Store Heavy Items Lower
This deserves its own section because it’s both practical and sensible.
Heavy pantry items should generally be kept on lower shelves where they’re easier to lift and handle.
Examples include:
- Large rice containers
- Flour containers
- Large oil bottles
- Bulk grains
- Large jars
Lighter products can go higher.
A Simple Rule
Heavy → Low
Medium → Middle
Light → High
It’s a small change, but it can make everyday pantry use much easier.
📏 Step 6: Measure Before Buying Storage
This is where many pantry makeovers go hilariously wrong.
Someone sees a beautiful set of storage bins online.
They order it.
It arrives.
And then…
It doesn’t fit. 😭
Don’t make that mistake.
Before purchasing anything, measure:
Width
How much horizontal space is available?
Depth
How far does the shelf go?
Height
How much vertical clearance do you have?
Cabinet Opening
The internal shelf may be wider than the actual cabinet opening.
Door Clearance
Make sure containers don’t interfere with the cabinet door.
🧺 Step 7: Use Pantry Storage Bins for Packets
Not every pantry product needs to be transferred into a container.
This is one of the biggest points of this Pantry Organization Guide.
For packaged products, pantry bins can be more practical.
Use bins for:
- Biscuit packets
- Chips
- Snack packets
- Sachets
- Small boxes
- Breakfast packets
- Pasta packets
A clear or open-front bin lets you group similar products together while keeping them easy to access.
For more detailed recommendations, check out our guide to Best Pantry Storage Bins.
🫙 Step 8: Use Airtight Containers for Dry Ingredients
For ingredients that benefit from sealed storage, use suitable airtight containers.
These can be useful for:
- Rice
- Dal
- Flour
- Sugar
- Semolina
- Cereals
- Dry fruits
- Pasta
The important distinction is:
Pantry Bin
Organizes products.
Airtight Container
Stores food in a sealed container.
You can also use both together.
For example, several airtight containers can sit inside a larger pantry bin to create an organized section.
🧩 Step 9: Consider Modular Storage
If you’re organizing several shelves, modular storage can make your system much more cohesive.
Modular containers can offer:
- Different sizes
- Consistent shapes
- Coordinated lids
- Flexible arrangements
- Better shelf planning
This is especially useful when you’re trying to create a long-term pantry system rather than simply solving one messy shelf.
For a detailed comparison of the two storage approaches, see our Modular vs Stackable Storage guide.
⬆️ Step 10: Make Use of Vertical Space
Look at your pantry shelves.
How much empty space exists above your containers?
If there’s a lot of unused height, you’re potentially wasting valuable storage space.
This is where stackable storage can help.
You can use:
- Stackable containers
- Shelf risers
- Tiered organizers
- Tall storage bins
- Vertical racks
However, don’t stack everything just because you can.
Accessibility Still Matters
If you need to remove four containers every time you want the one underneath, your pantry isn’t really more convenient.
Use vertical storage where it improves the system—not where it makes access frustrating.
🔄 Step 11: Follow the FIFO Method
Here’s a simple pantry-management trick that can make a surprisingly big difference.
FIFO = First In, First Out
The idea is simple:
Older products go toward the front.
Newer products go toward the back.
So when you buy another packet of pasta, don’t simply throw it in front of the old one.
Move the older packet forward and place the new one behind it.
This can help with:
- Cereals
- Pasta
- Packaged foods
- Canned products
- Baking supplies
- Snacks
It also makes it easier to notice products approaching their expiry dates.
🌶️ Step 12: Create a Dedicated Spice Zone
Spices have a special talent for making kitchens look chaotic. 😂
A tiny packet here.
A jar there.
Three spice mixes hiding behind the chilli powder.
The solution is a dedicated spice area.
You can use:
- Spice racks
- Tiered organizers
- Small containers
- Drawer organizers
- Wall-mounted racks
- Rotating spice organizers
Keep your most frequently used spices closest to your main cooking area.
For more ideas, see our guides on Best Spice Racks, Spice Organization Ideas and Wall Mounted vs Countertop Spice Rack.
🥫 Step 13: Keep Bottles and Cans Together
Bottles and cans can quickly become difficult to manage because of their weight and shape.
Create a separate section for them.
For example:
Sauces
- Tomato sauce
- Chilli sauce
- Soy sauce
Canned Foods
- Vegetables
- Beans
- Soups
Cooking Bottles
- Vinegar
- Oil
- Specialty sauces
Keep heavier bottles and cans on lower shelves whenever possible.
🍪 Step 14: Create a Dedicated Snack Zone
If snacks are constantly scattered around your pantry, give them a specific home.
A snack zone might contain:
- Biscuits
- Chips
- Crackers
- Namkeen
- Chocolates
- Small packaged snacks
Using one or two bins can make this section much easier to manage.
Why It Works
Instead of searching the entire pantry for snacks, everyone knows:
Snacks = This Bin.
Simple.
Effective.
And considerably less dramatic. 😂
🏷️ Step 15: Label Your Storage
Labels aren’t mandatory, but they can make a big difference—especially when several people use the kitchen.
Simple labels are enough:
SNACKS
BREAKFAST
BAKING
PASTA
SPICES
TEA & COFFEE
DRY GOODS
SAUCES
You don’t need fancy printed labels.
Even simple, consistent labels can make it easier to return items to their correct location.
🧠 The Goal Is a Pantry That Stays Organized
The most important lesson from this Pantry Organization Guide is that organization isn’t a one-time activity.
You don’t want to spend six hours arranging your pantry on Sunday and then watch it collapse by Thursday.
A good system should be:
Easy to Understand
Everyone knows where things belong.
Easy to Access
Daily-use items don’t require rearranging.
Easy to Maintain
Putting things away takes seconds.
Flexible
You can adjust it when your shopping habits change.
📋 Pantry Organization Guide: The 15 Rules So Far
| Rule | Why It Helps |
|---|---|
| Declutter first | Removes unnecessary clutter |
| Clean shelves | Creates a fresh starting point |
| Create categories | Makes items easier to find |
| Organize by usage | Keeps everyday items accessible |
| Keep heavy items low | Easier handling |
| Measure shelves | Prevents storage mistakes |
| Use pantry bins | Groups packaged products |
| Use airtight containers | Better for suitable dry ingredients |
| Consider modular storage | Creates a flexible system |
| Use vertical space | Reduces wasted height |
| Follow FIFO | Helps use older products first |
| Create a spice zone | Keeps small items organized |
| Group bottles and cans | Prevents shelf clutter |
| Create a snack zone | Makes snacks easy to find |
| Add labels | Gives everything a designated home |
💡 One Final Rule Before You Buy Anything
Don’t start your pantry makeover by shopping.
Start by looking at your pantry.
Ask yourself:
What is actually causing the mess?
Is it too many packets?
Buy bins.
Is it loose rice and dal?
Consider airtight containers.
Is there lots of unused vertical space?
Look at stackable storage.
Are your containers completely mismatched?
Consider a modular system.
Are spices impossible to find?
Create a dedicated spice zone.
That’s the whole philosophy behind this Pantry Organization Guide:
Choose storage to solve a problem—not because the organizer itself looks irresistible.
Because at the end of the day, the prettiest pantry in the world isn’t useful if you still can’t find the biscuits. 😄
🧺 16. Use Narrow Bins for Small Packets
Small packets are some of the biggest troublemakers in a pantry. They don’t stack properly, slide behind larger containers and somehow manage to occupy much more space than they deserve. 😅
This is where narrow pantry bins can be extremely useful.
Use them for:
- Soup sachets
- Seasoning packets
- Instant coffee
- Baking sachets
- Small snack packets
- Ready-to-use mixes
- Gravy or sauce sachets
Instead of spreading these items across several shelves, give them one dedicated location.
💡 Our Tip
Choose a bin that’s narrow enough to fit the available space but deep enough to hold the packets upright.
If you can see the top of every packet, you’ll spend less time digging through the bin.
⬆️ 17. Add Shelf Risers to Create Extra Levels
Shelf risers are one of the simplest ways to improve pantry organization without replacing your cabinets.
Imagine you have a shelf that’s tall enough to fit two rows of products, but everything is currently sitting on the bottom.
A shelf riser creates an additional level.
This works particularly well for:
- Canned foods
- Spice jars
- Small containers
- Tea boxes
- Coffee
- Sauces
- Small pantry staples
Why Shelf Risers Work
Instead of having products hidden behind one another, you create a tiered arrangement.
That improves visibility without requiring additional cabinetry.
⚠️ Just Measure First
Check the height of the riser and the products you want to place underneath it.
You don’t want to create another shelf that is technically there but too short to be useful.
🔄 18. Rotate Your Pantry Stock Regularly
Even if you’re following FIFO, your pantry needs occasional maintenance.
When new groceries arrive, take a few seconds to rotate older products forward.
For example:
Old cereal → Front
New cereal → Back
The same principle can be used for:
- Pasta
- Noodles
- Biscuits
- Canned foods
- Baking products
- Packaged snacks
This simple habit can prevent forgotten products from sitting at the back of your pantry for months.
🥫 19. Organize Cans With a Dedicated System
Canned products are heavy, cylindrical and surprisingly annoying to organize.
Instead of piling them randomly, create a dedicated can section.
You can use:
- Can organizers
- Deep pantry bins
- Tiered shelves
- Pull-out organizers
- Wire baskets
Organize by Type
For example:
Vegetables
Beans
Soups
Fruits
Ready-to-eat foods
Keeping similar products together makes inventory checks much faster.
💡 Storage Tip
Because cans can become heavy quickly, keep them on a lower shelf whenever practical.
🌀 20. Use Lazy Susans for Awkward Corners
Corner spaces are notorious for becoming pantry black holes.
You put something in the back and then completely forget it exists.
A lazy Susan can make these awkward areas much easier to access.
They’re especially useful for:
- Sauces
- Condiments
- Oils
- Vinegar
- Small jars
- Spreads
- Frequently used bottles
Instead of reaching behind everything, simply rotate the organizer.
Best Use
Don’t overload it.
A lazy Susan works best when the items are easy to see and remove.
🧴 21. Keep Cleaning Products Away From Food
This sounds obvious, but it’s worth mentioning in any serious Pantry Organization Guide.
Food storage and household cleaning products should have clearly separated storage areas.
Keep products such as:
- Dishwashing supplies
- Surface cleaners
- Disinfectants
- Scrubbers
- Cleaning chemicals
away from food and food-contact storage.
If your kitchen doesn’t have a separate utility cabinet, dedicate a clearly separated section and keep cleaning products properly contained.
🚫 Don’t Store Chemicals Above Food
If a bottle leaks, you don’t want it dripping onto pantry items.
A simple rule works well:
Food high and central.
Cleaning supplies separate and secure.
🫙 22. Don’t Overfill Your Containers
A container isn’t more useful simply because you managed to squeeze another 500 grams of food into it.
Leave enough room to:
- Close the lid properly
- Scoop ingredients easily
- See the contents
- Clean the container
- Handle it safely
Overfilled containers can also become difficult to lift.
This is especially important for heavy staples such as rice, flour and dal.
💡 A Good Rule
Fill containers according to how much you comfortably use, not the maximum amount they can physically hold.
🏷️ 23. Label Containers With More Than Just the Food Name
Labels don’t have to be complicated.
For basic pantry organization, names such as:
RICE
DAL
SUGAR
FLOUR
are perfectly fine.
But you can also use labels strategically.
For example:
“Everyday Spices”
Instead of labeling ten tiny containers individually.
“Baking”
For a whole bin containing:
- Cocoa
- Sprinkles
- Baking powder
- Vanilla
- Decorating supplies
“Snacks”
For a basket containing packaged snacks.
This can reduce visual clutter while still making your system easy to understand.
👀 24. Keep Frequently Used Products Visible
Visibility is one of the most underrated parts of pantry organization.
If you can’t see something, there’s a good chance you’ll forget about it.
This is why transparent containers and open-front pantry bins are so popular.
You can quickly identify:
- How much rice is left
- Whether you’re running out of cereal
- Which snacks are available
- Whether you already have a particular ingredient
It can also help prevent unnecessary duplicate purchases.
💡 But Don’t Decant Everything
You don’t need to transfer every single product into a clear container.
For packaged foods, the original packaging may already provide enough visibility.
Use containers where they actually improve the system.
🛒 25. Create a Small Pantry Inventory
This is our final smart tip in this Pantry Organization Guide, and it’s particularly useful if you frequently buy groceries in bulk.
You don’t need a complicated spreadsheet.
A simple list on your phone can be enough.
Track items such as:
- Rice
- Flour
- Dal
- Sugar
- Oil
- Pasta
- Cereal
- Tea
- Coffee
- Frequently used spices
You don’t need to record every biscuit packet.
Focus on products you regularly buy and don’t want to accidentally duplicate.
📋 Pantry Organization Guide: All 25 Smart Tips
Now let’s put everything together.
| # | Pantry Organization Tip | Main Benefit |
|---|---|---|
| 1 | Declutter before organizing | Removes unnecessary items |
| 2 | Clean your shelves | Creates a fresh starting point |
| 3 | Create categories | Makes items easier to find |
| 4 | Organize by usage | Keeps everyday items accessible |
| 5 | Keep heavy items low | Easier and safer handling |
| 6 | Measure before buying | Prevents fitting problems |
| 7 | Use pantry storage bins | Groups packaged foods |
| 8 | Use airtight containers | Better for suitable dry foods |
| 9 | Consider modular storage | Creates a flexible system |
| 10 | Maximize vertical space | Uses unused shelf height |
| 11 | Follow FIFO | Helps use older products first |
| 12 | Create a spice zone | Keeps spices organized |
| 13 | Group bottles and cans | Reduces shelf clutter |
| 14 | Create a snack zone | Makes snacks easy to find |
| 15 | Label storage | Gives everything a home |
| 16 | Use narrow bins | Organizes small packets |
| 17 | Add shelf risers | Creates extra storage levels |
| 18 | Rotate pantry stock | Prevents forgotten products |
| 19 | Organize cans | Makes heavy items manageable |
| 20 | Use lazy Susans | Improves corner access |
| 21 | Separate cleaning products | Keeps food storage safer |
| 22 | Don’t overfill containers | Improves accessibility |
| 23 | Use practical labels | Makes categories clearer |
| 24 | Keep products visible | Helps with inventory |
| 25 | Maintain a pantry inventory | Reduces duplicate purchases |
🏠 Pantry Organization Guide for Small Kitchens
A small kitchen requires a slightly different strategy.
You don’t necessarily need more storage.
You need to make better use of the storage you already have.
1. Use Vertical Space
Stack compatible containers where practical.
2. Choose Narrow Organizers
Don’t waste valuable shelf width with oversized bins.
3. Use Cabinet Doors
Depending on the cabinet design, slim door-mounted organizers can hold lightweight items such as:
- Spices
- Sachets
- Foils
- Small packets
Make sure the organizer doesn’t interfere with the cabinet shelves or door mechanism.
4. Use Shelf Risers
Create a second level where there is unused height.
5. Keep Counters Clear
Move pantry products back into designated storage zones whenever possible.
6. Avoid Buying Huge Containers
Large containers can consume valuable space unnecessarily.
Buy based on actual usage.
🏢 Pantry Organization Guide for Apartment Kitchens
Apartment kitchens often have limited cabinet space, which means every storage decision matters.
A practical setup could look like this:
Upper Shelf
Lightweight and rarely used products.
Eye-Level Shelf
Everyday ingredients.
Middle Shelf
Snacks and packaged foods.
Lower Shelf
Heavy containers and bottles.
Cabinet Door
Small, lightweight items where compatible with the cabinet.
This arrangement keeps the products you use most frequently within easy reach.
🧩 Modular vs Stackable Storage for Pantry Organization
Both storage approaches can work well, but they solve slightly different problems.
Modular Storage
Best when you want:
- Consistent container sizes
- Multiple capacities
- A coordinated pantry
- Flexible arrangements
- Long-term organization
Stackable Storage
Best when you want:
- Vertical storage
- Better use of shelf height
- Compact organization
- Affordable storage
- Simple solutions
The Best Option?
A combination.
For example:
Modular airtight containers + stackable design
for pantry staples.
And:
Clear pantry bins + handles
for snacks and packets.
For a full comparison, see our Modular vs Stackable Storage guide.
🧺 How to Choose the Right Pantry Storage Bins
If you’re using bins as part of your Pantry Organization Guide, don’t choose them based only on appearance.
Look at:
Width
Will the bin fit comfortably beside other organizers?
Depth
Can you still reach the back of the shelf?
Height
Will it fit beneath the shelf above?
Handles
Useful for deep cabinets.
Transparency
Clear bins make contents easier to identify.
Stackability
Useful if vertical space is available.
Material
Choose a material suitable for your intended use.
Cleaning
Smooth surfaces are usually easier to maintain.
For more detailed recommendations, read our Best Pantry Storage Bins guide.
🫙 Pantry Bins vs Airtight Containers
This is one of the most important distinctions to understand.
| Storage Type | Best Used For |
|---|---|
| Pantry Bin | Packets and packaged foods |
| Airtight Container | Dry ingredients |
| Modular Container | Coordinated pantry systems |
| Stackable Container | Vertical storage |
| Lazy Susan | Corners and bottles |
| Shelf Riser | Creating extra levels |
| Spice Rack | Spices and seasoning |
You don’t need one product to do everything.
A good pantry uses different storage solutions for different problems.
📍 Where Should Everything Go?
A simple pantry layout can look like this:
👀 Eye Level
Keep:
- Tea
- Coffee
- Breakfast products
- Everyday spices
- Frequently used ingredients
🧺 Middle Shelves
Keep:
- Snacks
- Pasta
- Baking supplies
- Packaged foods
🏋️ Lower Shelves
Keep:
- Rice
- Flour
- Large containers
- Bottles
- Cans
⬆️ Upper Shelves
Keep:
- Backup supplies
- Seasonal ingredients
- Rarely used products
- Specialty cooking ingredients
This simple hierarchy can make a pantry feel dramatically easier to use.
🔄 The FIFO Pantry System Explained
FIFO stands for:
First In, First Out
It means you use older products before newer ones.
For example, you have:
Old pasta → New pasta
When you buy another packet, put the new packet behind the old one.
Then use the old one first.
FIFO Works Particularly Well For:
- Cereals
- Pasta
- Noodles
- Canned foods
- Baking ingredients
- Packaged snacks
It is a simple system, but it can make a big difference in preventing forgotten food.
🧹 How Often Should You Organize Your Pantry?
You don’t need to completely reorganize your pantry every week.
Instead, use a maintenance routine.
Every Week
Spend a few minutes returning misplaced items.
Every Month
Check:
- Expiry dates
- Spills
- Empty containers
- Duplicate products
Every 2–3 Months
Remove items from the shelves and clean thoroughly.
Before a Major Grocery Trip
Do a quick inventory.
This prevents you from buying something you already have.
⚠️ Pantry Organization Mistakes to Avoid
Even a beautifully designed pantry can become chaotic if the system is impractical.
❌ Buying Organizers Before Measuring
Always measure first.
❌ Decanting Everything
Not every product needs a container.
❌ Using Huge Containers
Large isn’t always better.
❌ Overstacking
Don’t sacrifice accessibility for capacity.
❌ Ignoring Expiry Dates
Organization should make food rotation easier.
❌ Putting Heavy Items Up High
Keep them lower whenever practical.
❌ Creating Too Many Categories
If you have a separate category for every tiny product type, maintaining the system becomes annoying.
❌ Buying Too Many Organizers
You can have too much storage.
Seriously.
At some point, the organizers become the clutter. 😂
👍 Pantry Organization: What We Like and What We Don’t
| What We Like | What We Don’t Like |
|---|---|
| Easier access to ingredients | Initial setup takes time |
| Better use of shelf space | Quality organizers can cost more |
| Clear categories | Requires regular maintenance |
| Less visual clutter | Too many bins can create clutter |
| Easier grocery planning | Some containers take up extra space |
| Better food rotation | Labels may need updating |
| Easier cleaning | Over-organizing can become inconvenient |
🧠 The 80/20 Rule for Pantry Organization
You don’t have to organize every single item perfectly.
Focus on the areas that cause 80% of the problems.
For many kitchens, that’s:
- Snack packets
- Spices
- Dry ingredients
- Deep shelves
- Bottles
- Small sachets
Fix those areas first.
You’ll often notice a huge improvement without spending a fortune.
🛍️ Do You Actually Need to Buy New Organizers?
Not necessarily.
Before shopping, see whether you already own useful containers.
You may have:
- Existing baskets
- Food-safe containers
- Small boxes
- Trays
- Jars
- Unused organizers
Repurpose them if they’re suitable for the job.
The goal of a Pantry Organization Guide isn’t to convince you to buy more things.
It’s to help you create a better system with the space and resources you already have.
🏡 Create Zones Instead of Random Shelves
A pantry becomes much easier to maintain when each shelf or section has a purpose.
For example:
Shelf 1
Breakfast + tea
Shelf 2
Snacks
Shelf 3
Pasta + baking
Shelf 4
Rice + dal
Shelf 5
Bulk supplies + bottles
This doesn’t have to be exactly how your pantry is arranged.
The important idea is:
Give each area a job.
Once every area has a purpose, putting things away becomes much easier.
🧺 The Ideal Pantry Doesn’t Need to Be Perfect
A practical pantry may have:
- Matching containers in some areas
- Original food packaging in others
- A few storage bins
- Some labels
- A shelf riser
- A lazy Susan
- A slightly chaotic snack drawer
And that’s okay.
Your pantry is a working part of your kitchen.
It doesn’t need to look like a showroom 24/7.
The goal is to make it functional, accessible and easy to maintain.
🏆 Pantry Organization Guide: The Ideal Setup
If we were designing a practical pantry from scratch, we’d use something like this:
🫙 Dry Ingredients
Airtight containers.
🍪 Snacks
Clear pantry bins.
🌶️ Spices
Dedicated spice organizer.
🥫 Cans
Lower shelf with a suitable organizer.
🧴 Bottles
Lower shelf or handled bin.
🥣 Breakfast
Eye-level zone.
🧁 Baking
Dedicated medium-accessibility zone.
📦 Backup Stock
Higher or lower storage depending on weight and frequency.
🏷️ Labels
Simple category labels.
🔄 FIFO
Older products toward the front.
That’s enough.
You don’t need an elaborate commercial-style pantry system.
🔬 Our Research Methodology
We developed this Pantry Organization Guide by evaluating practical kitchen-storage strategies based on space utilization, accessibility, visibility, category management, food rotation, cleaning, maintenance and long-term usability.
We considered different kitchen setups, including compact apartment kitchens, traditional kitchen cabinets, deep pantry shelves and larger storage areas.
We also evaluated how different organizational products—including pantry bins, airtight containers, modular storage, stackable containers, shelf risers and lazy Susans—can solve different storage problems.
The goal was not simply to create a visually appealing pantry. We focused on strategies that are realistic to maintain in an everyday kitchen.
📋 Pantry Organization Checklist
Before you call your pantry makeover complete, check:
- ☐ Expired products removed
- ☐ Shelves cleaned
- ☐ Similar products grouped
- ☐ Heavy items stored lower
- ☐ Everyday items easily accessible
- ☐ Older products moved forward
- ☐ Pantry bins assigned to categories
- ☐ Dry ingredients stored appropriately
- ☐ Spices organized
- ☐ Small packets contained
- ☐ Vertical space used where practical
- ☐ Containers aren’t overfilled
- ☐ Labels added where useful
- ☐ Cleaning supplies separated from food
- ☐ Grocery inventory checked
If most of these boxes are ticked, you’re already well on your way to a much more functional pantry. 🙌
🏆 Pantry Organization Guide: Build a System That Actually Works
By now, your pantry should have gone through the important stages: decluttering, cleaning, categorizing and assigning storage zones.
But here’s the thing about kitchen organization: getting everything neat once is easy.
Keeping it neat is the real challenge. 😄
A good pantry system should make it almost automatic to put things away. You shouldn’t have to stop and think, “Where does this packet go again?” Every category should have an obvious home.
That’s why the final stage of this Pantry Organization Guide focuses on creating a pantry that’s practical for everyday life—not just beautiful immediately after you’ve finished organizing it.
🧠 Create a Pantry System Everyone Can Understand
If you’re sharing your kitchen with family members, your pantry organization system needs to be simple enough for everyone to follow.
There’s no point creating an elaborate system where only one person knows where everything belongs.
For example:
Breakfast Zone
Oats, cereals, breakfast mixes
Snack Zone
Biscuits, chips, crackers and namkeen
Cooking Essentials
Rice, flour, dal, sugar
Baking Zone
Baking powder, cocoa, sprinkles and baking ingredients
Tea & Coffee
Tea, coffee, sugar and related supplies
Spice Zone
Everyday spices and seasoning
When the categories are obvious, everyone can return products to the correct location.
That’s the secret to a pantry that stays organized.
🏷️ Keep Labels Simple
Labels can make a pantry look organized, but don’t go overboard.
You don’t need:
“Premium Artisanal Baking Ingredient Collection”
Just write:
BAKING
That’s it. 😂
Good pantry labels should be:
- Easy to read
- Consistent
- Short
- Visible
- Relevant to the contents
If you’re using clear bins, category labels are particularly useful because you can identify the contents and the storage zone at the same time.
🫙 When Should You Decant Food?
Decanting means transferring food from its original packaging into another container.
It can look fantastic, but you don’t have to decant everything.
Decanting Makes Sense For:
- Rice
- Dal
- Flour
- Sugar
- Cereals
- Pasta
- Dry fruits
- Pulses
Especially when you use these products frequently.
You Can Keep Original Packaging For:
- Biscuits
- Chips
- Small snacks
- Sachets
- Ready-to-eat foods
- Products you use occasionally
There’s no prize for transferring every food product into a container.
Your pantry should be functional, not a full-time art project. 😄
🔒 Choose Containers According to the Food
This is another important principle in our Pantry Organization Guide.
Different foods have different storage requirements.
Dry Staples
Rice, dal and flour can benefit from suitable airtight containers.
Snacks
Packaged snacks can generally remain in their original packaging and be grouped inside pantry bins.
Spices
Small airtight containers or dedicated spice organizers can work well.
Bottles
Handled bins or dedicated bottle storage can keep them together.
Cans
Use sturdy organizers or a dedicated lower shelf.
The storage solution should follow the product—not the other way around.
📦 Don’t Fill Every Empty Space
This might sound strange in a storage guide, but empty space is useful.
If every shelf is packed completely full, your pantry becomes difficult to use.
Leave some room for:
- New groceries
- Moving containers
- Removing products
- Cleaning
- Future changes
A pantry that’s 100% full isn’t necessarily efficiently organized.
Sometimes 80–90% utilization is more practical because it leaves enough breathing room to actually use the storage.
🔄 Use a Restocking Routine
Once your pantry is organized, establish a simple restocking habit.
When groceries arrive:
Step 1
Check what you already have.
Step 2
Move older products toward the front.
Step 3
Put newer products behind them.
Step 4
Refill containers if appropriate.
Step 5
Return everything to its assigned zone.
This process can take only a few minutes.
But doing it consistently prevents your carefully organized pantry from slowly returning to chaos.
🛒 Create a Backup Stock Zone
If you buy groceries in bulk, don’t mix your backup stock with the products you’re currently using.
For example, if you have:
One open rice container
and
Two unopened rice bags
keep the unopened bags in a designated backup area.
The same can apply to:
- Flour
- Sugar
- Pasta
- Cereals
- Snacks
- Tea
- Coffee
- Cooking essentials
This prevents your everyday shelves from becoming overloaded.
🏠 Organize Your Pantry Around Frequency of Use
A useful pantry doesn’t just organize products by category.
It also organizes them by how frequently you use them.
Daily
Keep at eye level.
Several Times a Week
Keep nearby and easily accessible.
Weekly
Middle shelves are fine.
Monthly
Higher or lower shelves can work.
Rarely
Use the least convenient storage areas.
This small adjustment can make your kitchen feel much more efficient.
🌀 How to Organize Pantry Corners
Corners can be difficult because products at the back often become invisible.
If you have a deep corner:
Option 1: Lazy Susan
Excellent for bottles and jars.
Option 2: Handled Bin
Pull the whole bin forward.
Option 3: Narrow Containers
Use the available depth more efficiently.
Option 4: Store Rarely Used Items
If the space is difficult to access, don’t waste it on everyday ingredients.
Put specialty or occasional-use products there instead.
🧺 How to Organize Deep Pantry Shelves
Deep shelves offer lots of storage capacity—but they can also create accessibility problems.
The classic problem:
Product in front
⬇️
Product behind it
⬇️
Something you haven’t seen since 2023
😂
Handled pantry bins can help because you can pull an entire category forward.
For example:
Bin 1
Snacks
Bin 2
Baking
Bin 3
Breakfast
Bin 4
Small packets
Instead of reaching into the back of the shelf, pull the relevant bin toward you.
This is one reason we recommend checking out our Best Pantry Storage Bins guide alongside this Pantry Organization Guide.
⬆️ How to Use Vertical Space Without Creating Chaos
Stacking is useful, but there needs to be a limit.
Good Stacking
Two or three stable containers that you can easily access.
Bad Stacking
A giant tower that requires you to remove everything just to reach the bottom container.
The goal is:
Maximum useful storage
not
Maximum possible stacking
Keep frequently accessed items near the top or in easily removable containers.
🧩 Modular Storage Can Make Expansion Easier
If you’ve completely reorganized your pantry and like the system you’ve created, modular storage can make future changes easier.
For example, you may eventually need:
- A larger rice container
- More medium containers
- Smaller spice containers
- Additional snack bins
A modular system can allow you to expand while maintaining a consistent appearance.
For the full comparison between modular and stackable systems, see:
Modular vs Stackable Storage: Which Is Better for Kitchen Organization?
🌶️ Create a Practical Spice System
A spice section doesn’t need to be complicated.
Start with the spices you use most frequently.
Everyday Spices
Keep these closest to your cooking area.
Whole Spices
Keep them together.
Spice Blends
Give them a separate section if you use several varieties.
Rarely Used Spices
These can go farther back or higher.
You can also use a tiered rack so the labels remain visible.
The goal is to prevent the classic:
“I know I have cumin somewhere…”
followed by five minutes of cabinet excavation. 😂
🥫 Organize Bottles by Height
Bottles can create awkward storage because they’re often taller than other pantry items.
Try grouping them by height.
Tall Bottles
Keep together.
Medium Bottles
Keep together.
Small Jars
Use a separate bin or shelf.
This creates a cleaner arrangement and makes it easier to see everything.
For frequently used sauces and condiments, a lazy Susan can also work particularly well.
🍪 Keep Snacks Accessible but Controlled
Snacks should be easy to access—but that doesn’t mean they should take over your pantry.
Create a specific snack zone.
A clear pantry bin can hold:
- Biscuits
- Crackers
- Chips
- Namkeen
- Small packaged snacks
When the bin is full, that’s your visual reminder that you probably don’t need another snack packet.
Well… unless it’s your favorite one. Then we’ll allow it. 😂
🧹 How to Clean Pantry Storage Containers
Your pantry shelves aren’t the only things that need cleaning.
Storage containers should also be maintained.
For Dry Food Containers
- Empty the container.
- Remove leftover food.
- Wash according to the manufacturer’s instructions.
- Rinse properly.
- Dry completely.
- Refill with fresh food.
Important
Don’t add new food to a container containing old residue.
If you’re refilling rice, flour or other dry ingredients, make sure the container is clean and dry first.
⚠️ Don’t Mix Old and New Food Without Checking
If you’re refilling a container, don’t blindly pour new food over the old contents.
Check:
- Expiry dates
- Appearance
- Smell
- Condition
- Remaining quantity
If the older food has been sitting around too long or its condition is questionable, don’t simply cover it with a fresh batch.
The whole purpose of organization is to make food management easier and safer.
🛍️ Make Grocery Shopping Easier
One unexpected advantage of a good Pantry Organization Guide is that pantry organization can make grocery shopping much simpler.
When everything is visible, you can quickly identify what you’re running low on.
For example:
Low Rice
Add to grocery list.
Plenty of Dal
Don’t buy more.
Two unopened pasta packets
Skip pasta this week.
No Tea
Definitely buy tea. ☕
This simple visual inventory can reduce unnecessary duplicate purchases.
📱 Keep a Digital Grocery List
You don’t need a complicated inventory-management app.
Your phone’s notes app is enough.
Create categories like:
Pantry
- Rice
- Dal
- Flour
- Sugar
Breakfast
- Oats
- Cereal
Snacks
- Biscuits
- Namkeen
Beverages
- Tea
- Coffee
Update it whenever something runs out.
Simple systems are more likely to be maintained.
🧠 Don’t Organize According to Trends
A pantry can look beautiful online with:
- Matching containers
- Perfect labels
- Identical baskets
- Decorative shelves
But your kitchen doesn’t need to copy someone else’s pantry.
Your storage system should reflect:
- Your cooking habits
- Your family size
- Your grocery routine
- Your available space
- Your budget
- Your preferred ingredients
If you don’t use glass containers, don’t buy them simply because they look aesthetic.
If you don’t need twenty bins, don’t buy twenty.
Functional beats trendy.
Every single time.
💰 Pantry Organization on a Budget
You don’t need a huge budget to organize your kitchen.
Start with what you already have.
Use Existing Containers
Repurpose suitable containers before buying new ones.
Buy Only Problem-Solving Organizers
If one shelf is messy, fix that shelf first.
Prioritize High-Impact Areas
Start with:
- Spices
- Snacks
- Deep shelves
- Dry ingredients
- Small packets
Add More Later
Once the system works, expand gradually.
A ₹300 organizer that solves a daily problem can be more valuable than a ₹3,000 organizer that simply looks pretty.
🏆 Pantry Organization Guide: Best Storage Solution by Problem
| Problem | Recommended Solution |
|---|---|
| Loose dry ingredients | Airtight containers |
| Too many snack packets | Clear pantry bins |
| Small sachets | Narrow bins |
| Wasted vertical space | Stackable containers |
| Mismatched storage | Modular system |
| Deep shelves | Handled bins |
| Difficult corners | Lazy Susan |
| Hidden spice jars | Tiered spice rack |
| Too many cans | Can organizer |
| Tall bottles | Dedicated bottle zone |
| Small shelves | Compact organizers |
| Expired products | FIFO system |
| Duplicate purchases | Pantry inventory |
| Cluttered shelves | Category-based zones |
🧺 Pantry Organization Guide: What You Should NOT Store Together
Some products are better kept separate.
Food + Cleaning Chemicals
❌ Avoid mixing them.
Strong-Smelling Products + Sensitive Foods
Keep products that may transfer odors appropriately separated.
Heavy + Fragile Items
Avoid placing heavy containers where they could fall onto fragile products.
Everyday + Backup Stock
Keep backup supplies separate so your everyday shelves remain accessible.
Wet + Dry Storage
Keep moisture away from dry ingredients and pantry staples.
A good pantry isn’t simply about putting similar-looking products together.
It’s also about storing things appropriately.
🏷️ Labeling System That Actually Works
If you’re labeling containers, keep the system consistent.
Use either:
Product-Based Labels
RICE
DAL
SUGAR
FLOUR
or:
Category-Based Labels
SNACKS
BAKING
BREAKFAST
TEA & COFFEE
Don’t mix five different labeling styles.
A consistent system looks cleaner and is easier for everyone to understand.
🔄 The 5-Minute Pantry Reset
Here’s a simple maintenance routine you can do regularly.
Minute 1
Return misplaced items.
Minute 2
Move older products forward.
Minute 3
Check for empty packets and containers.
Minute 4
Wipe obvious spills.
Minute 5
Check what you’re running low on.
That’s it.
You don’t need to spend your entire Sunday reorganizing your pantry.
A five-minute reset done consistently is much easier than a three-hour rescue mission once every six months.
🏠 How to Keep the Pantry Organized Long-Term
The best Pantry Organization Guide isn’t really about the day you organize everything.
It’s about what happens afterward.
Follow these simple habits:
One Product In → One Product Back
Put groceries away immediately.
Keep Categories Together
Don’t move products randomly.
Use FIFO
Older products forward.
Don’t Overfill
Leave breathing room.
Review Regularly
Check your pantry before major grocery trips.
Adjust When Necessary
If a category keeps becoming messy, your system may need to change.
🏆 Final Pantry Organization Guide: Our Ideal Setup
If we had to create one practical pantry system for an everyday kitchen, we’d use:
🫙 Airtight Containers
For rice, dal, flour, sugar and other suitable dry ingredients.
🧺 Clear Pantry Bins
For snacks, packets and small packaged products.
🧩 Modular Containers
For a consistent long-term storage system.
⬆️ Stackable Storage
For making better use of vertical space.
🌶️ Spice Organizer
For frequently used spices.
🌀 Lazy Susan
For awkward corners and bottles.
🏷️ Labels
For simple category identification.
🔄 FIFO
For rotating older products forward.
📱 Grocery List
For keeping track of frequently purchased staples.
This setup doesn’t require a giant pantry.
It can work surprisingly well even in a compact kitchen.
🏆 Final Verdict
A well-organized pantry isn’t about having the most expensive containers, the fanciest labels or the largest collection of matching baskets.
It’s about creating a system that makes sense.
Start with the basics:
Declutter.
Clean.
Categorize.
Measure.
Choose the right storage.
Label where useful.
Keep everyday products accessible.
Rotate older products forward.
Maintain the system regularly.
The biggest mistake is trying to solve every storage problem by buying more organizers.
Sometimes you don’t need another container.
You just need to throw away the expired packet hiding behind the cereal box. 😂
That’s the real lesson behind this Pantry Organization Guide.
Your pantry should work for you.
It should make cooking easier, grocery shopping smarter and everyday kitchen life a little less chaotic.
And if you can open the cabinet, immediately find the rice, grab the spices and locate the biscuits without moving half the kitchen?
Congratulations. You have officially defeated pantry chaos. 🏆
🔬 Our Research Methodology
We developed this Pantry Organization Guide by evaluating practical kitchen-storage strategies based on space utilization, accessibility, visibility, category management, food rotation, cleaning, maintenance and long-term usability.
We considered different kitchen setups, including compact apartment kitchens, traditional kitchen cabinets, deep pantry shelves and larger pantry spaces.
We also evaluated how pantry bins, airtight containers, modular storage, stackable containers, shelf risers, lazy Susans and dedicated spice organizers can address different storage problems.
Our focus was not simply on creating a visually attractive pantry. We prioritized practical systems that are realistic to maintain in an everyday kitchen.
❓ Frequently Asked Questions
1. What is the best way to organize a pantry?
Start by removing unnecessary items, cleaning the shelves and grouping similar products together. Then assign different zones based on how frequently you use each category.
Use suitable storage bins and containers only where they solve a genuine organization problem.
2. How do I organize a small pantry?
Use vertical space with stackable containers and shelf risers. Choose narrow organizers for small packets and keep frequently used items at eye level.
Avoid oversized containers that consume valuable shelf space.
3. Should I use pantry storage bins?
Pantry bins are particularly useful for grouping packaged foods such as snacks, sachets, breakfast products and small boxes.
Clear bins can also make it easier to see what’s inside.
4. Are clear containers better for pantry organization?
Clear containers can improve visibility because you can see the contents without opening them.
However, you don’t need to transfer every food product into a clear container. Use them where they genuinely make organization easier.
5. How should I organize pantry shelves?
Organize shelves based on category, frequency of use and weight.
Keep everyday products accessible, heavy items lower and rarely used products in less convenient areas.
6. Where should heavy pantry items go?
Heavy products such as large rice containers, flour containers, bottles and bulk ingredients should generally be kept on lower shelves where they’re easier to handle.
7. Should rice and dal be stored in airtight containers?
Suitable airtight containers can be a practical option for storing dry ingredients such as rice and dal.
Always follow the manufacturer’s storage instructions and make sure containers are clean and completely dry before refilling.
8. How often should I clean my pantry?
A quick weekly reset can keep the pantry under control.
Do a more thorough cleaning every few months or whenever you notice spills, crumbs or expired products.
9. What is FIFO pantry organization?
FIFO means First In, First Out.
Place older products toward the front and newer products behind them so that older items are used first.
10. How can I stop my pantry from becoming cluttered?
Give every category a designated home, avoid overfilling shelves, maintain a simple inventory and return products to their correct zones after shopping.
11. Are modular containers worth buying?
They can be worth it if you want a coordinated storage system with different sizes and flexible arrangements.
However, don’t buy a large modular set unless the sizes actually match your pantry needs.
12. How can I maximize vertical pantry space?
Use stackable containers, shelf risers and tiered organizers where appropriate.
Just make sure you can still access the products without dismantling an entire tower of containers.
📌 Pantry Organization Guide Checklist
Before finishing your pantry makeover, make sure you have:
- ✅ Removed expired products
- ✅ Removed unnecessary clutter
- ✅ Cleaned all shelves
- ✅ Created practical categories
- ✅ Measured storage areas
- ✅ Assigned everyday products to accessible shelves
- ✅ Kept heavy products low
- ✅ Used pantry bins where appropriate
- ✅ Used airtight containers for suitable dry ingredients
- ✅ Used vertical space
- ✅ Organized spices separately
- ✅ Created a snack zone
- ✅ Separated cleaning supplies
- ✅ Added labels where useful
- ✅ Started using FIFO
- ✅ Created a grocery inventory
- ✅ Left some usable space for new groceries
Pantry Organization Pantry Organization Pantry Organization Pantry Organization Pantry Organization Pantry Organization Pantry Organization Pantry Organization Pantry Organization Pantry Organization